Helios Rust Console Bot Documentation
Kit Manager
Build and inspect Rust kits in the dashboard, add them to your server, and export emote wheel images for players.
- Last reviewed
- Tested on
- Helios Bot Testing dashboard
- Maintained by
- Helios RCE
Build kits visually, inspect kits already on your server, and make quick-chat wheel graphics for your community. Open the dashboard, choose Manage Server → Kit Manager. Premium is required to manage live server kits.
Inspect a kit already on your server
- Expand Kit Builder.
- Under Presets, choose a kit from Load Kit From Server.
- Review its Wear, Main Inventory, and Belt slots, including item quantities.
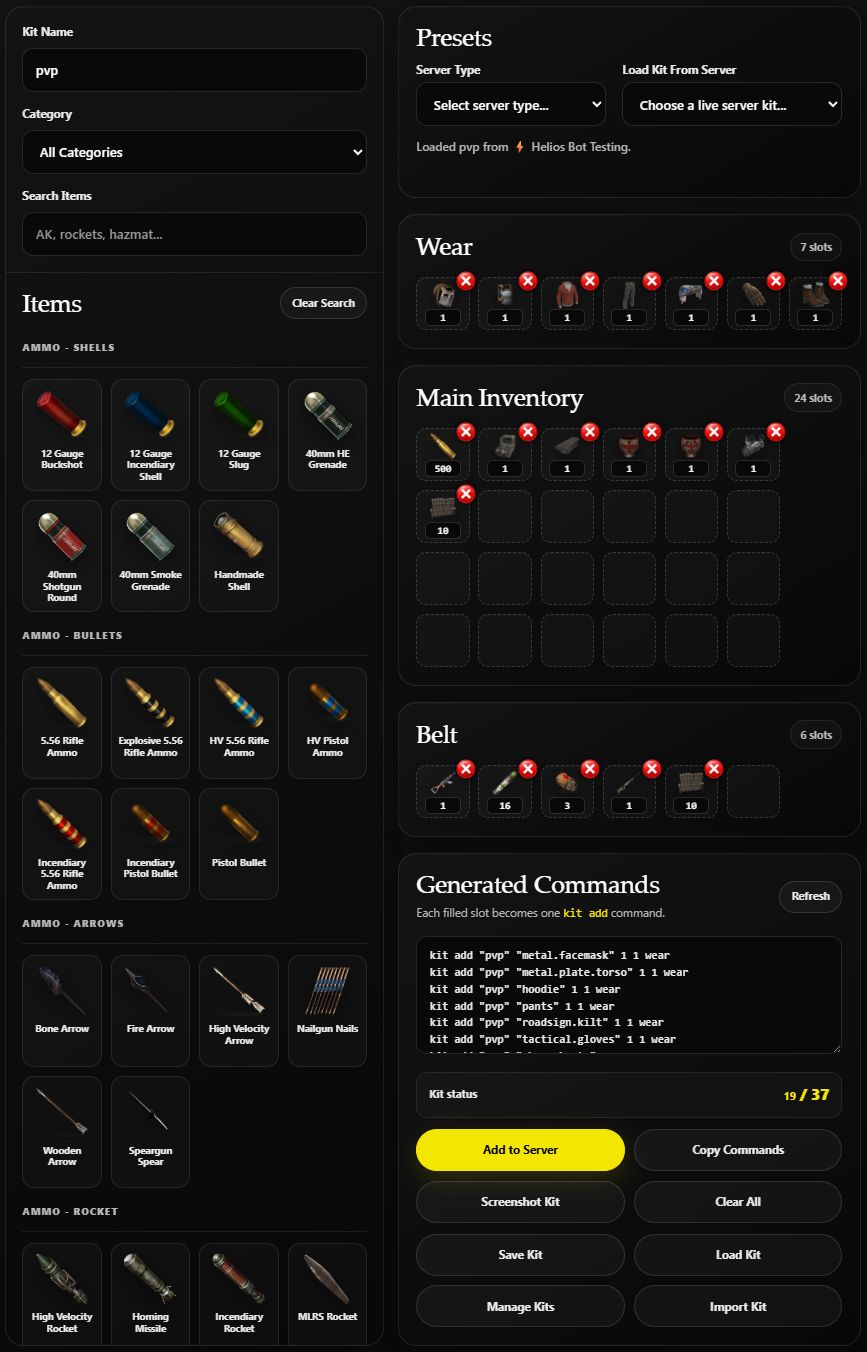
The existing pvp kit loaded from Helios Bot Testing. Loading it only fills the builder; it does not change the server kit.
This example has 19 filled slots, including armour, 500 rifle ammo, an Assault Rifle, and 16 Medical Syringes. Use it to check that gear is in the right container before giving the kit to players.
Build a new kit
- Enter a new Kit Name, such as
starter_v2. - Search for items and drag them into the desired slots. You can also select an item and click a slot.
- Set quantities and remove unwanted items with their × button.
- Review Generated Commands and the filled-slot count.
- When ready, choose Add to Server and wait for the result.
The layout supports 7 Wear, 24 Main Inventory, and 6 Belt slots. To start from a built-in kit, choose a Server Type under Presets and load one of its kit options.
Add to Server sends the kit commands immediately. It adds the listed items and does not first delete an existing kit with the same name. Use a fresh name when making a variant, then check the live result before replacing a kit players already use.
Open Kit Manager → Kits on this server and choose Refresh Kits to check the live list after adding a kit. Use Player Tools to give a test kit to a linked player on the selected server.
Save or share your work
| Control | What it does |
|---|---|
| Save Kit / Load Kit | Keeps and reopens kit designs in this browser |
| Copy Commands | Copies the generated kit commands for a backup or manual use |
| Import Kit | Opens the import tools for an existing design |
| Screenshot Kit | Creates a kit graphic you can share |
Saving a design in the browser does not install it on the game server. Keep a command backup if you need to move the design to another browser or device.
Make an emote wheel image
- Expand Emote Bind Wheel Images and choose Refresh Wheels.
- Find the wheel you want to share.
- Choose Download PNG or Copy Image.
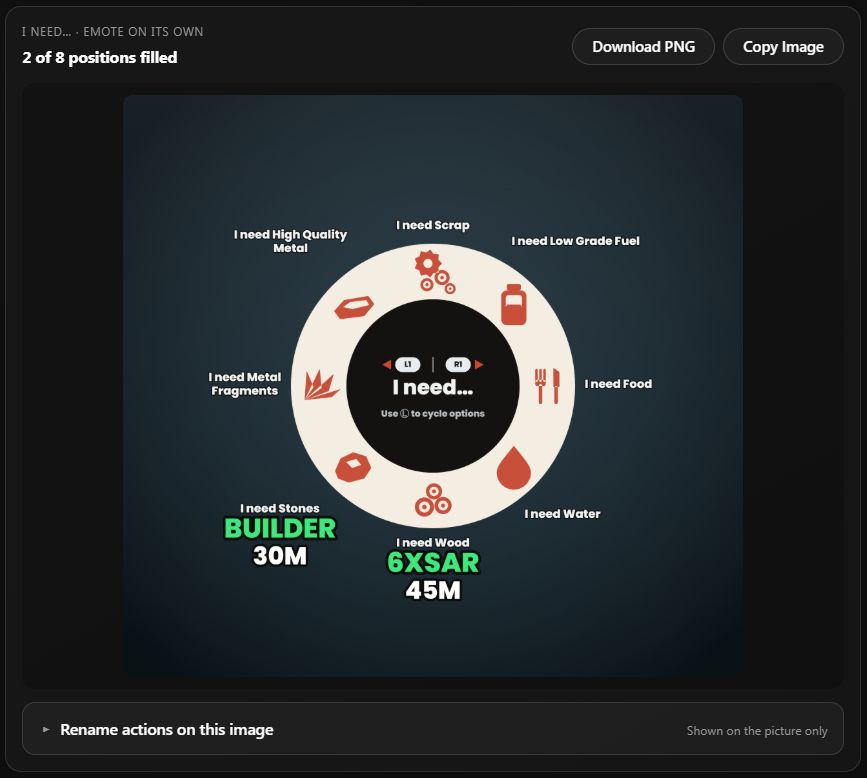
The image uses your active Emote Binds, including their actions and cooldowns. Paused binds are left off. In this example, players can see exactly which phrase requests Builder or 6XSAR.
Rename actions on this image changes the labels on the picture only. It does not rename the actual kit or edit the bind. Those display names are saved in this browser for this server.
Remove an old kit
Expand Kit Manager, find the kit, and choose its trash button. Confirm the kit name and selected server before choosing Yes, Delete Kit. Deletion removes the live kit from that server.
Before deleting or renaming a kit, use /kit info kit_name:"<KIT>" to check where Helios uses it. Keep a backup with /kit grab. See the Discord kit commands for viewing, exporting, and copying kits between servers.