Helios Rust Console Bot Documentation
Neon Signs
Create a Neon Sign in Auto Events, capture its position, and understand live editing and movement.
- Last reviewed
- Tested on
- Dashboard walkthrough on Helios Bot Testing with an unsaved position capture. In-game examples supplied by Helios.
- Maintained by
- Helios RCE
Neon Signs use the Auto Events editor to build text from colored zones in your Rust Console world. Open Dashboard → Manage Server → Automations → Auto Events → Create Auto Event.
Use a connected, enabled game server with Premium and permission to manage it. Set Location also needs your own linked player online on that game server.
In-game examples
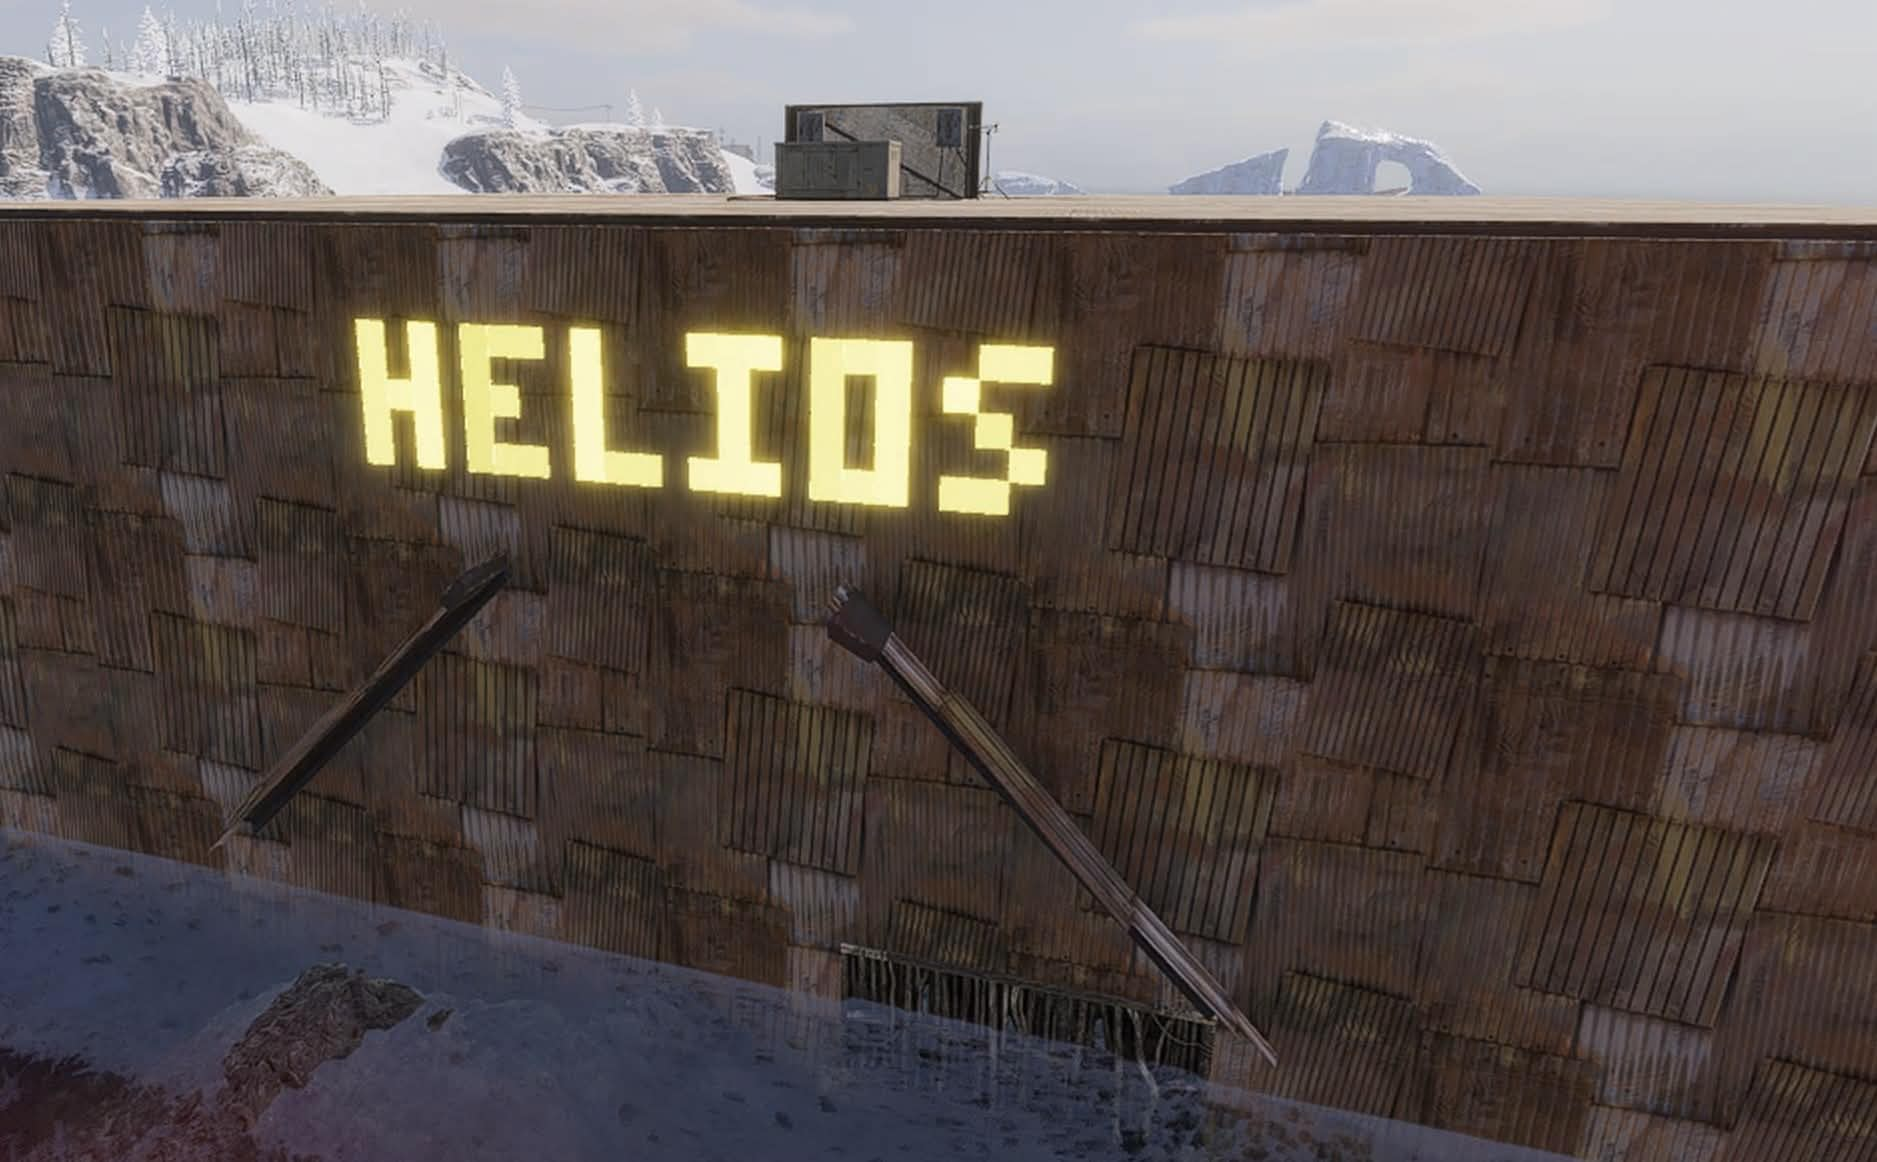
HELIOS wall sign: a short word with bright yellow lettering. In-game example supplied by Helios; select it to view the original image.
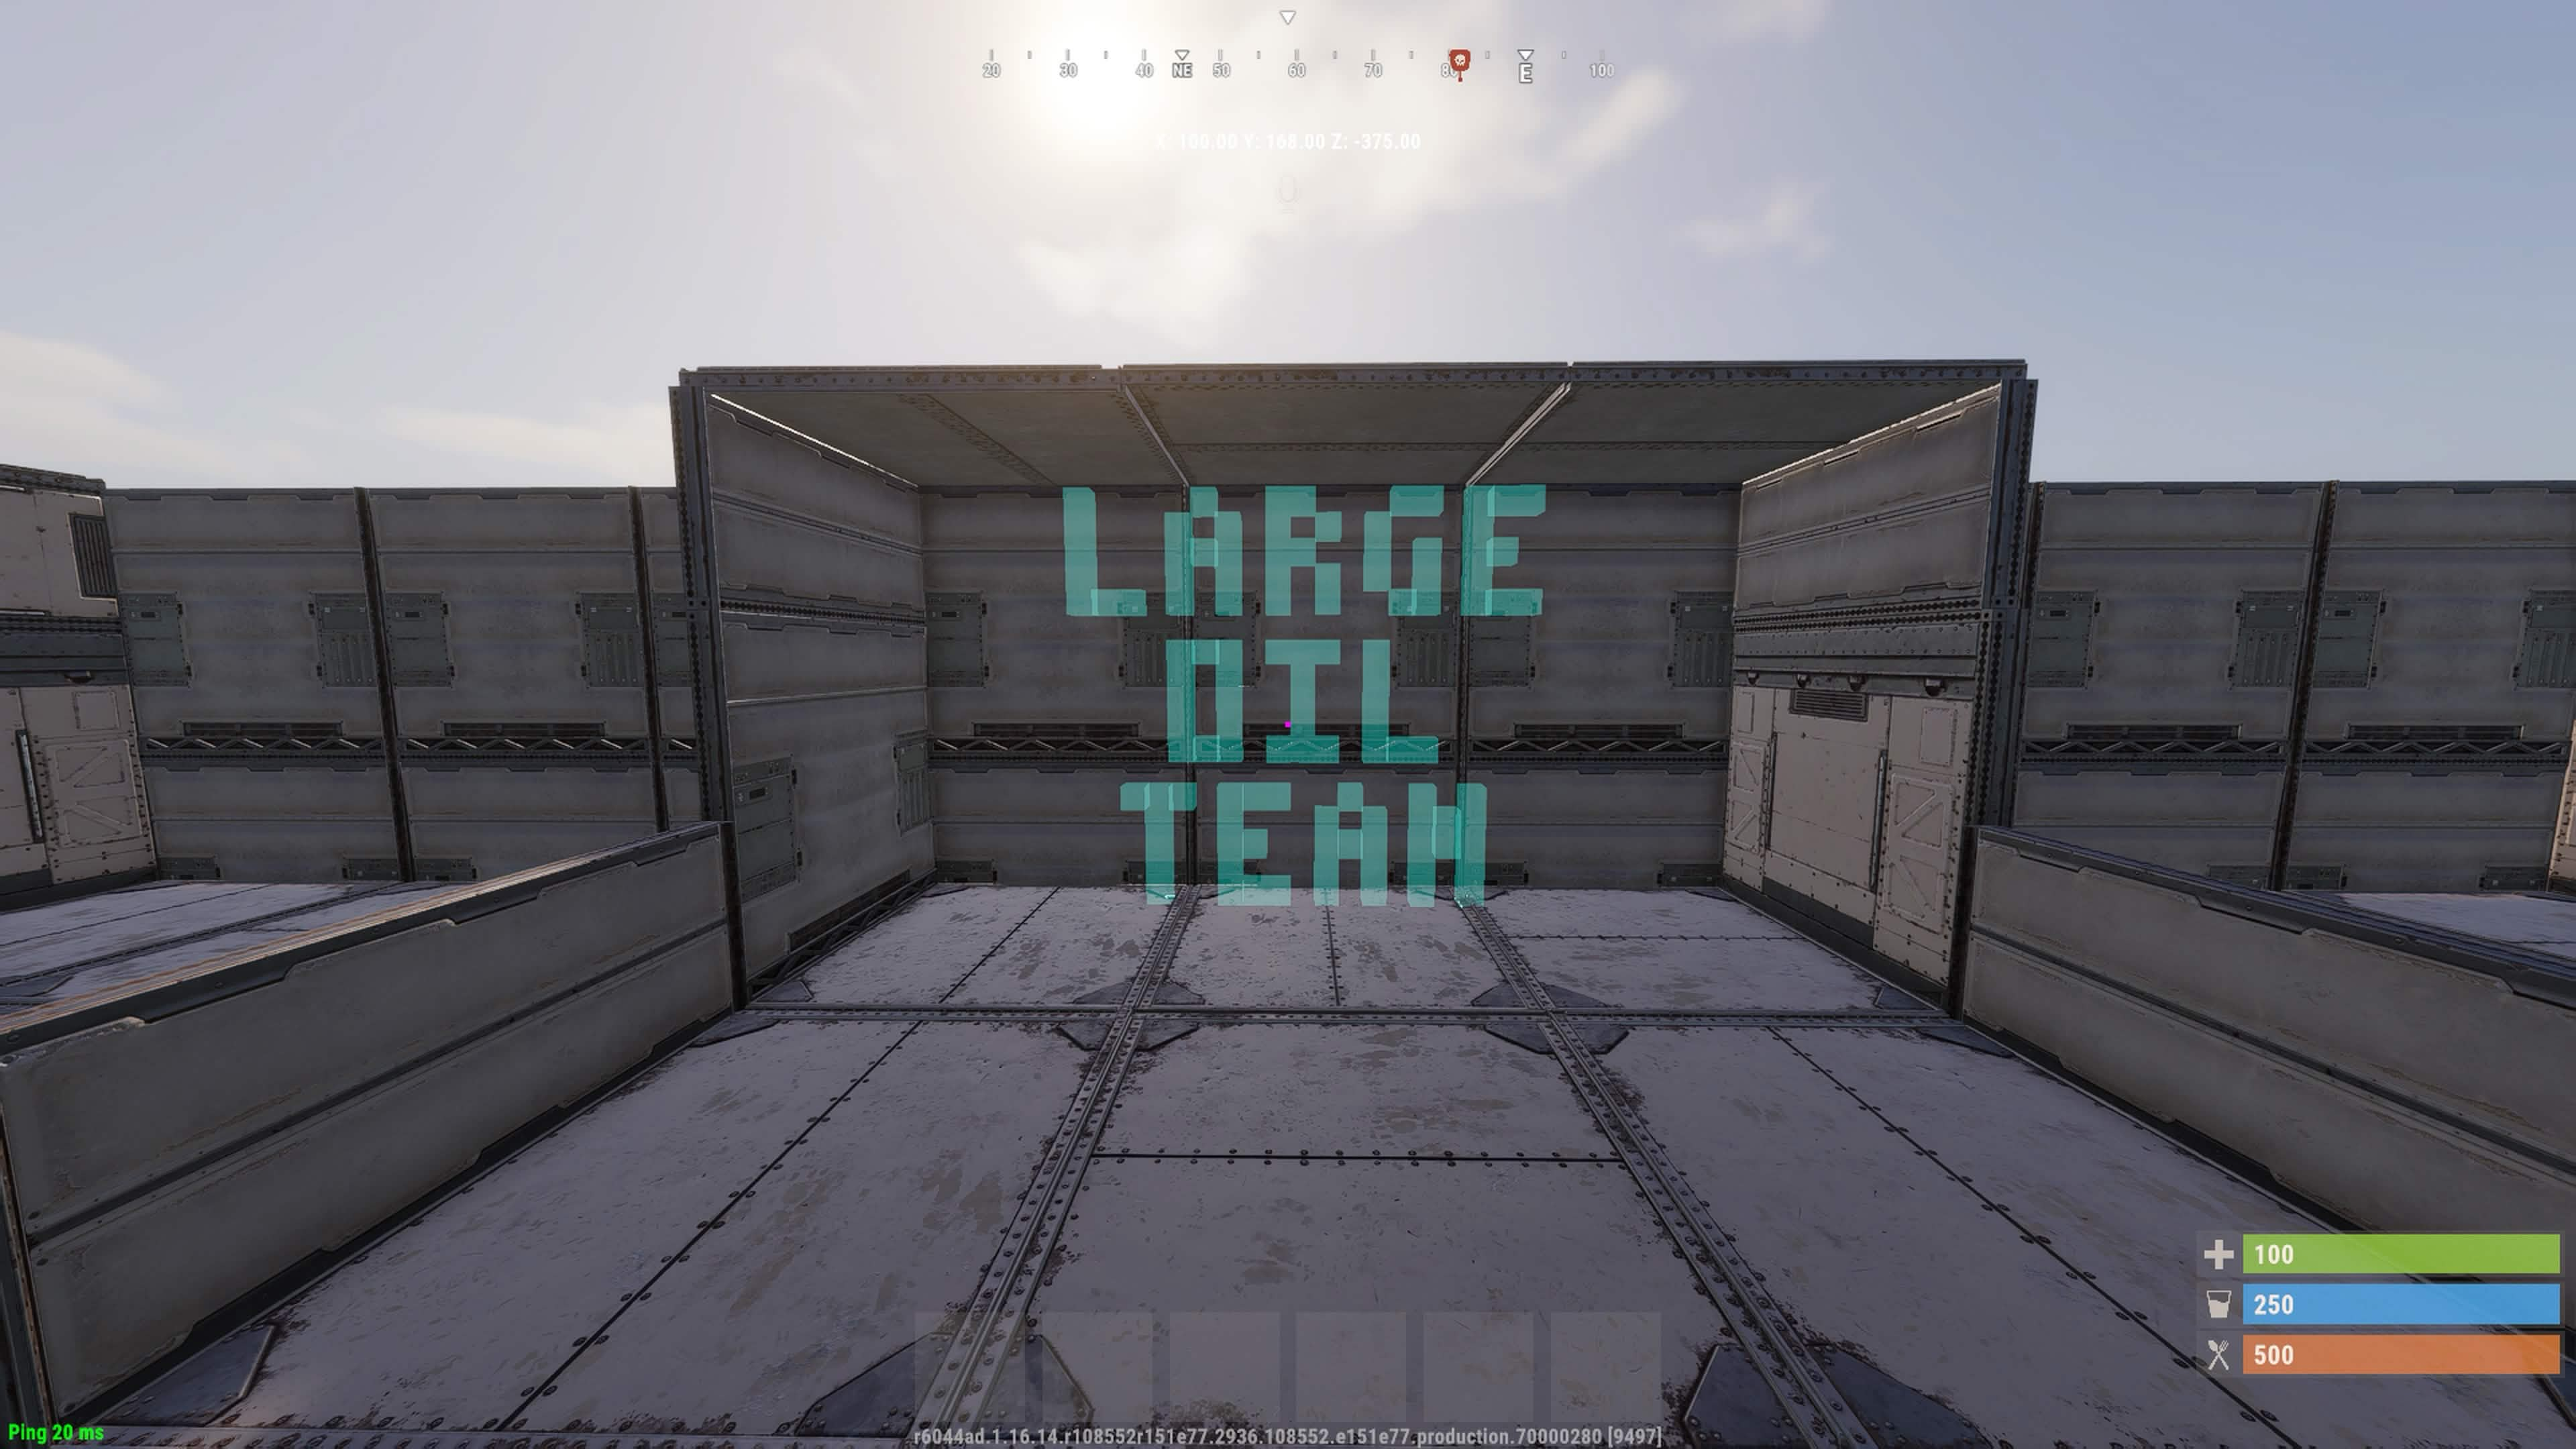
LARGE OIL TEAM: stacked text in cyan. These finished examples show how signs can look in the world; the walkthrough below uses a separate WELCOME TO HELIOS dashboard draft.
1. Choose Neon Sign and write the text
Enter a useful Event name, such as Welcome sign, then choose Neon Sign under Event preset. If you are editing a different event type, create a new event for the sign instead of trying to convert the old one.
Under Neon Sign controls:
- Enter Sign text, up to 90 characters. Keep it short enough to fit your chosen area.
- Pick a Color. Solid colors and patterns such as Rainbow are available.
- Choose Upright (wall) or Flat (ground) under Orientation.
- Check the sign preview, then scroll down for rotation and location.
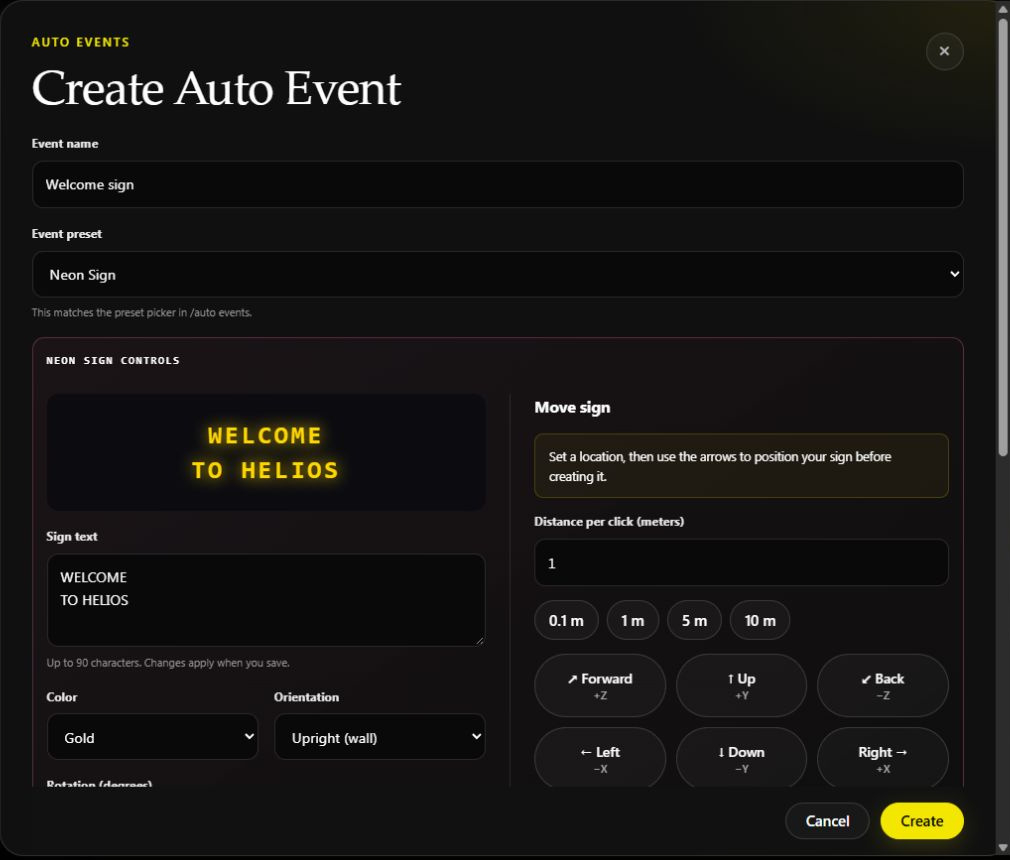
Actual dashboard draft on Helios Bot Testing. The preview illustrates the text and color; it is not an in-game screenshot or a placement check. Select any image for full size.
2. Capture and adjust the location
Stand where the sign's center should be on your selected game server, then choose Set Location under Event locations. Check Location set 1 → Neon Sign Center and its captured X, Y, and Z coordinates. A sign uses one location set.
Use Add Location Manually if you already know the correct world coordinates. Never copy the example coordinates as a recommended location for your map.
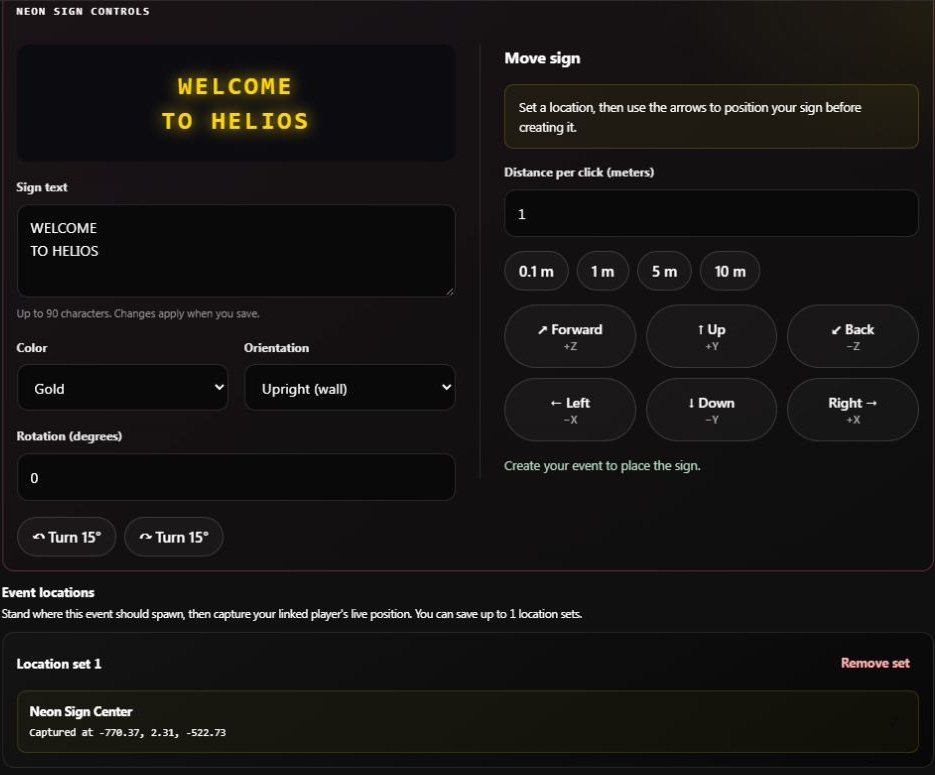
The center was read from the linked testing player's position. It remained in an unsaved draft; capturing it did not place a sign.
Set Rotation (degrees) from 0 to 359, or use either Turn 15° button. Under Move sign, choose Distance per click (meters), then use the arrows:
| Button | World coordinate |
|---|---|
| Left / Right | −X / +X |
| Down / Up | −Y / +Y |
| Back / Forward | −Z / +Z |
These directions use the world axes, not the direction your player is facing. Start with 0.1 m for fine adjustment or 1 m for larger steps. Before creation, movement changes only the draft coordinates.
3. Review before creating
The editor also includes the event's schedule, minimum population, announcement, and Auto Event is active switch. Choose those deliberately; a schedule is not a promise that saving an active sign waits until its next run.
Creating or saving an active Neon Sign requests an immediate in-game update. To save it without displaying it, leave Auto Event is active off. Leave Send the event announcement off if no announcement is intended.
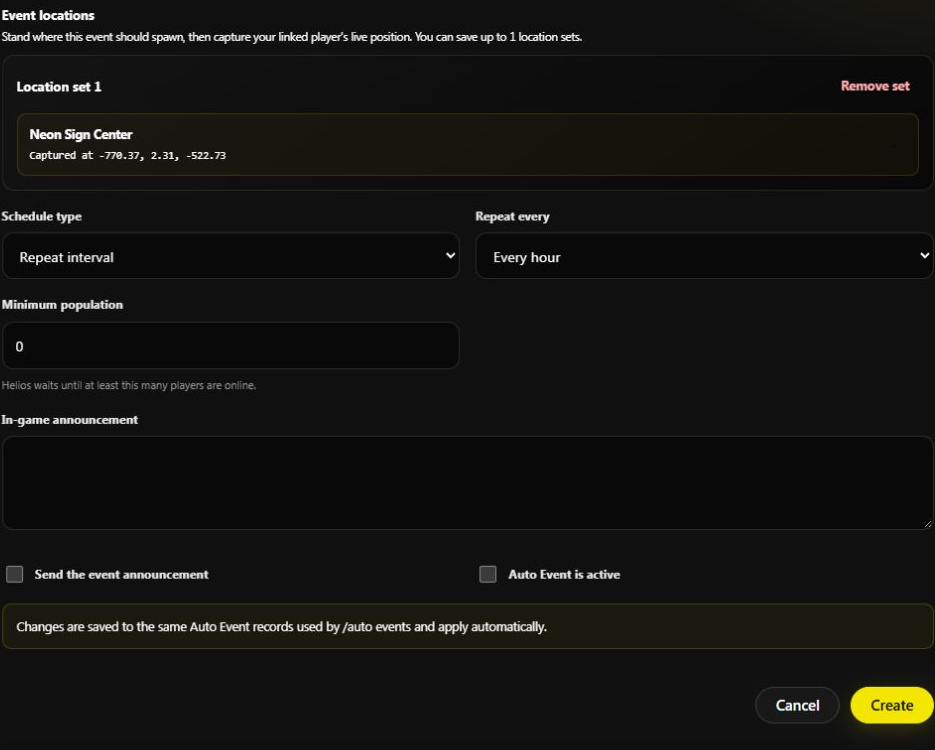
This example is inactive and was cancelled before Create. It shows the review controls, not a completed save or deployment.
Choose Create only when the name, position, appearance, and activity state are ready. Wait for the result. A paused result says the sign is saved and hidden; an active result can report Sign updated in-game. Verify the actual placement from inside Rust before relying on it.
Edit an existing sign
Open the saved Auto Event and choose Edit. Text, color, orientation, and rotation changes apply when you save. Movement arrows on an existing sign save each move automatically and update an active sign in game; Cancel does not undo moves that have already been saved.
Wait for one operation to finish before another. If the status says it is updating in game, let it complete. Use Rebuild sign on a saved sign to reapply its saved configuration after checking the server connection. A paused sign remains hidden.
Pause removes the displayed sign while keeping its configuration. Resume can deploy it again. Remove removes the sign and saved event, so use Pause if you want to keep it for later. Manage the sign through Auto Events rather than changing its generated zones individually.
If the result is uncertain
| Problem | What to do |
|---|---|
| Set Location fails | Check your own Discord link, online player, exact selected server, and RCON connection. |
| Text faces the wrong way | Review orientation and rotation in game; world-axis movement does not rotate the sign. |
| Sign is missing | Check active status and the saved center, then the server connection and operation result. |
| Settings saved, but live update failed | Reopen the saved event, check its settings, reconnect the game server, then use Rebuild sign. Do not create a second sign just to retry. |
| Request timed out or settings changed elsewhere | Reopen the event to inspect saved state before repeating the action. Some work may already have applied. |
After a map wipe, recheck the sign's coordinates and placement. See Auto Events for schedules and other presets, or Zones for ordinary custom-zone setup.