Helios Rust Console Bot Documentation
Welcome & Leave Messages
Choose Discord welcome and departure channels, personalize messages, and check their previews.
- Last reviewed
- Tested on
- Helios Bot Testing dashboard; existing settings inspected without saving or sending tests.
- Maintained by
- Helios RCE
Open your game server in the dashboard, choose Discord → General → Welcomer. The welcome and leave settings belong to the whole Discord community. Opening another Rust server in that community shows the same configuration.
Set up a welcome message
- Turn on Welcome message is active.
- Choose Welcome Channel. Helios needs permission to view and send messages there, plus Embed Links for a rich embed.
- Keep Use rich embed on for a title, color, and image. Turn it off for a plain message.
- Write your Welcome Message. Add an optional Embed Title and Text above embed.
- Read the live preview on the right, then choose Save Welcome Message when ready.
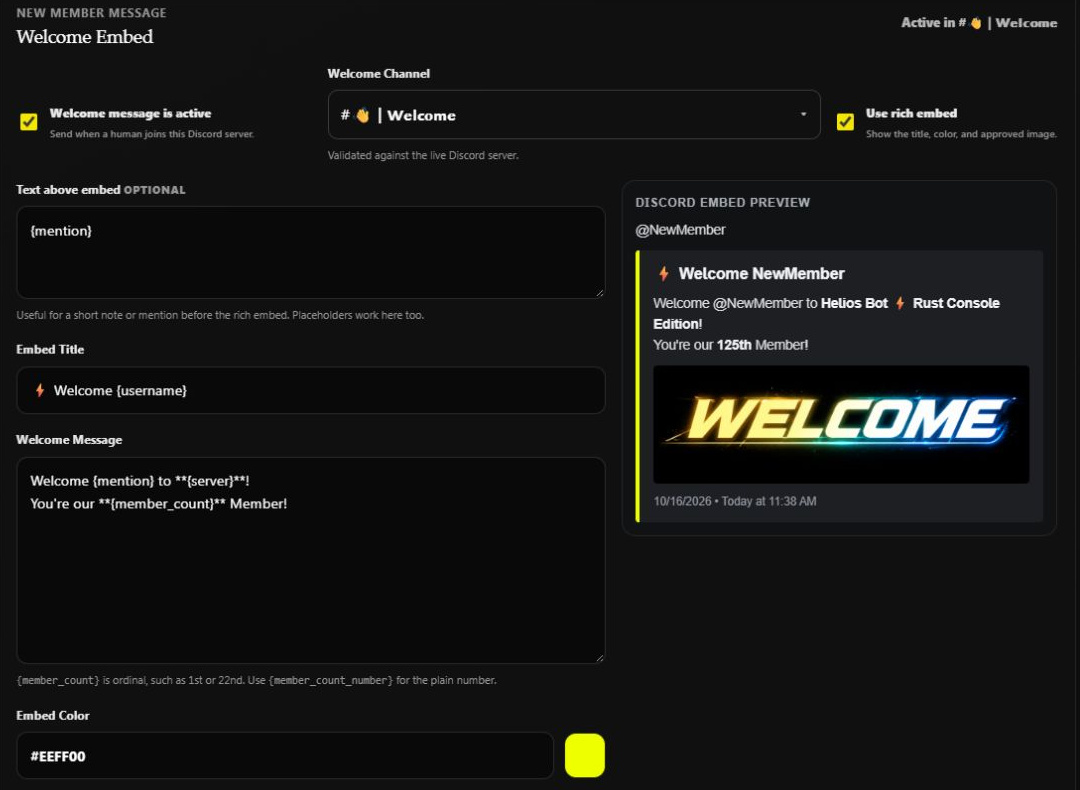
Existing testing-community settings. The preview uses a sample NewMember; it is not a new-member event or delivery receipt. Select any image to open it at full size.
Personalize the message
| Placeholder | Result |
|---|---|
{mention} | Mention the joining member. |
{username} | Their username. |
{server} | Your Discord community's name. |
{member_count} | Ordinal count, such as 125th. |
{member_count_number} | Plain number, such as 125. |
For example:
Welcome {mention} to **{server}**!
You're our **{member_count}** member. Read the rules and use /link to get started.
Only the joining member can be pinged by the welcome message. Do not use this as a way to notify every role whenever someone joins.
Images, testing, and saving
Use a direct HTTPS image link in Embed Image URL. The current approved image appears in the preview. Saving a new image updates that image immediately; it is a configuration change, not just a preview. Use View current image to inspect it.
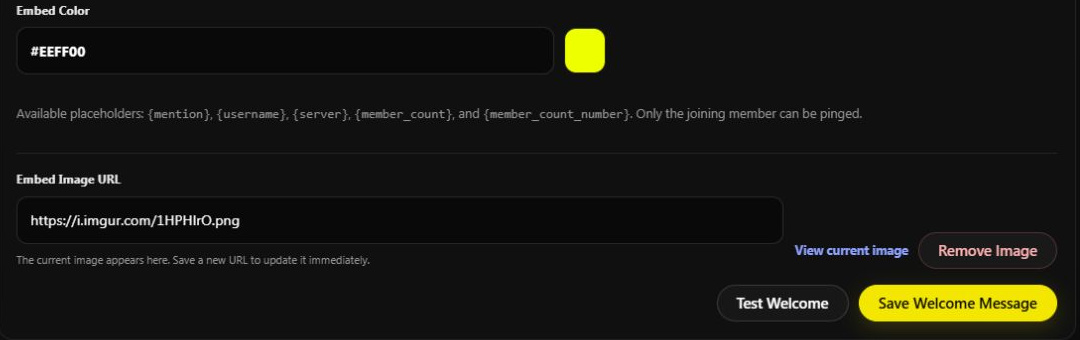
Test Welcome sends an actual message to the selected channel. Choose a suitable test destination first. A browser preview does not check Discord delivery permissions. After saving, verify a real join separately if you need to confirm the full member-event flow.
Add an optional leave message
Scroll to Leave Embed in the same Welcomer section:
- Turn on Leave message is active.
- Choose Leave Channel; it can match the welcome channel.
- Write the Leave Message, then choose title, color, image, and rich/plain formatting.
- Check the preview and choose Save Leave Message.
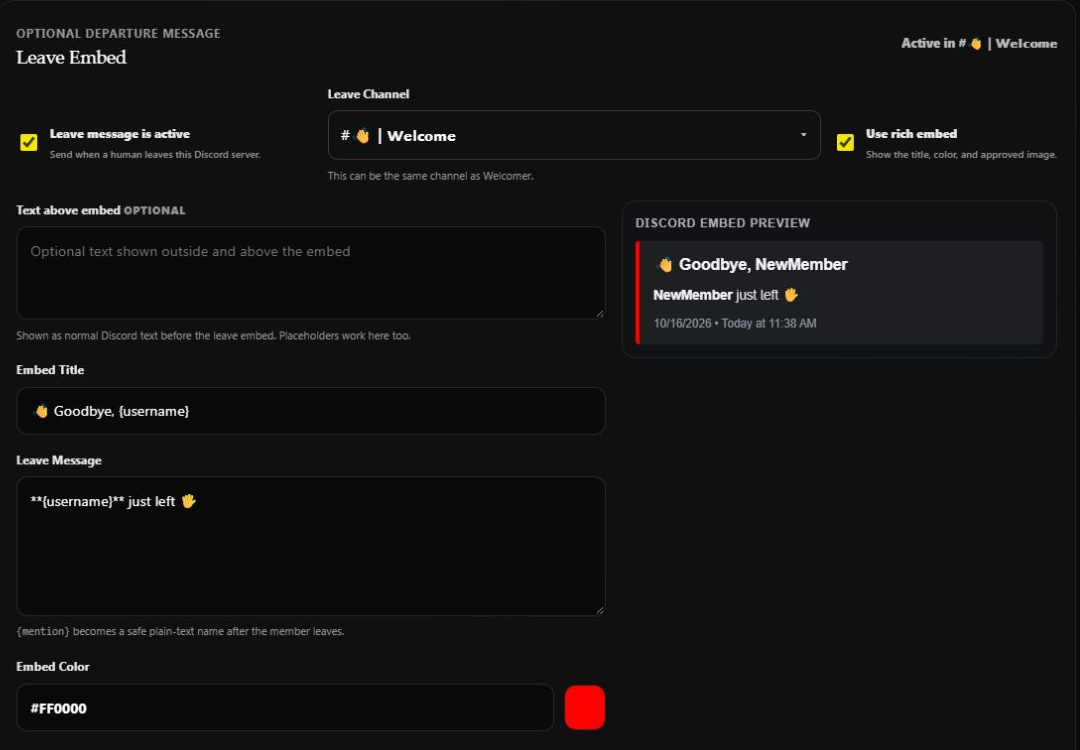
Leave messages use the same placeholders, but {mention} becomes a safe plain-text name after the person leaves. Test Leave posts a test; it does not remove a member. Welcome and leave activity switches are independent.
If nothing appears
Check the correct activity switch, saved channel, and Helios's permissions. Confirm the event involves a human member. If an image is missing, check its direct URL and the rich-embed option. Saving a message does not send it immediately to existing members.
Return to Discord Tools, or set up Auto & Sticky Roles for member roles.